Reflector / Light box
How to make a reflector
and "lightbox"
for
use with or without the PilleVippo bouncer
|
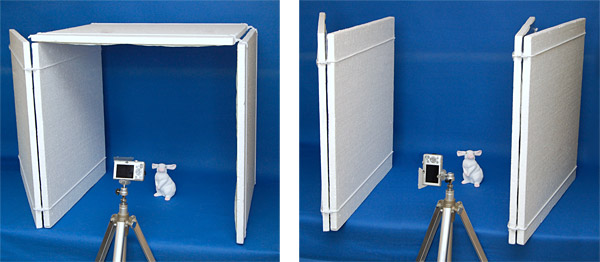
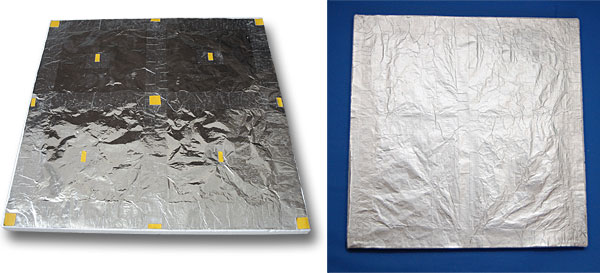
A cheap and versatile "DIY" solution for reflecting light.
- the two parts can be
put together in a shape of "box" or be used as separate reflectors ,
-
two sides; white and silver ,
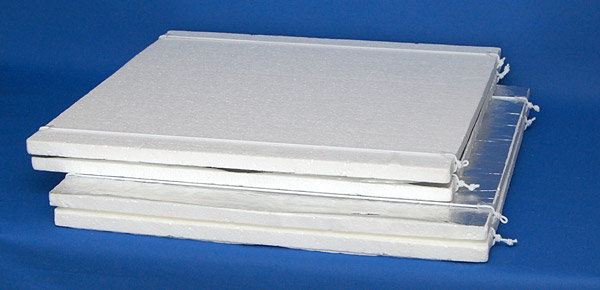
quick to setup, folds flat,
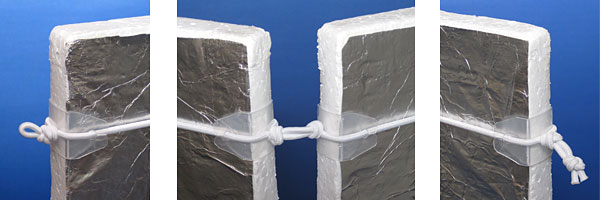
- the bungee cords that holds the refector sides
together also lets you fasten backgrounds,
hang objects from
"the ceiling" and attach the reflector to a shaft or similar .
|
 |
|
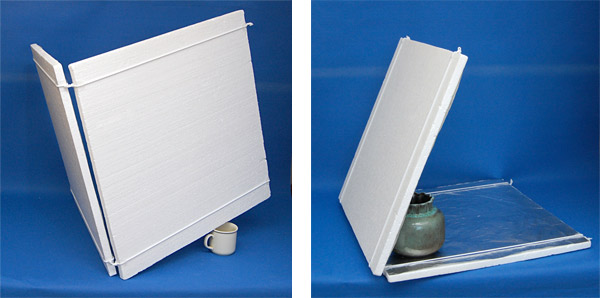
Alternative setups,
- Open backside, makes it possible to use a longer distance
between camera and
object and also to make dark/ toned backgrounds.
- Side light
(only when
the camera is in "portrait position")
|
 |
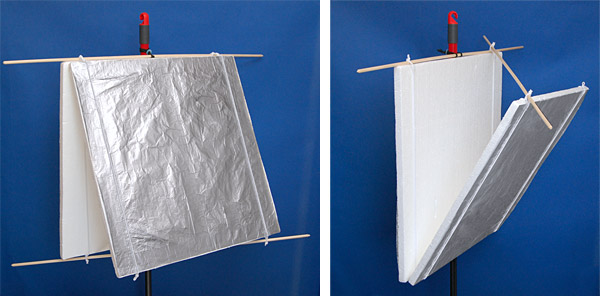
The reflectors can be tilted forwards or backwards
by placing some kind of
support like shown below.
|
Can also be fastened to a shaft with a couple of ball bungees and wood
sticks,
tilt up- or downwards like shown below.
(detail image)
 |
How to make it |
|
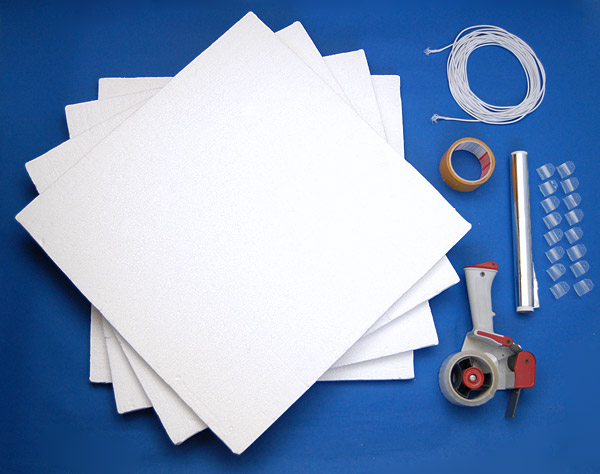
Materials:
- 4 pcs of styroform sheets,
size 60 x 60 cm and 20 mm thick.
(you can also use 10 mm foam
board (foam core), it's more robust but also more expensive...)
- aluminium foil (use
the matte side for reflector)
- 10 meters of 3 mm
(1/8 inch) white shock cord
- a piece/sheet of plastic for
the edge protectors
- double adhesive tape (I have used carpet
tape)
-
clear packing tape
|
|
1,
Make the "silver" side like
shown below (use the matte side of the aluminium as
reflector
to avoid "hot spots" and uneven light), reinforce the
edges (on the shiny side of the aluminium)
with tape and use a few bits of self
adhesive tape to fasten it to the styrofoam sheets.
 |
|
2,
Make the edge
protectors out of a piece of clear or white
plastic,
(I have used a piece
of polypropylene (PP) plastic from a cookie box),
these protectors prevents the cord from cutting
into the soft styroform edges.
cutting template:
Edge_protector.pdf
(for 10 and 20 mm thick
sheets)

|
|
3.
Cut the shock cord in four 240 cm
lengths and fold each one on the middle,
place the
knots like shown below (tighten hard between each
one),
cut off excess cord and melt the ends
with a lighter.

|
4.
Snap on the edge protectors.
 |
5.
Assemble as shown below.
 |
|
Copyright © Benny Johansson
|


